Artsy + Artsystems Integration
Artsy + Artsystems Integration
Set up your Artsy Integration in a few simple steps
Step-by-Step Guide
Tips and Tricks
Additional Support
Artsy and Artsystems teamed up to provide a powerful integration that lets you quickly and securely share artwork from your Artsystem5 (A5) database to Artsy’s global marketplace. The integration is free for Artsystem5 users and can be set up in just minutes.
See How It Works
Sharing data with Artsy only takes a few steps. Watch this short walk-through video or follow the directions below to get started.
Step-By-Step Setup
Step 1: Enable the Artsy API
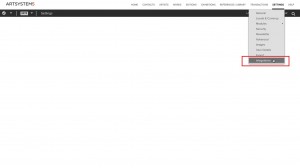
1. To get started, open the “Settings” menu and select “Integrations” via the drop-down panel.
2. Click the “Enable” checkbox next to ARTSY. Then click the “Sign Up” button or “Sign In” if you already have an Artsy account. This will direct you to an Artsy login page where you enter your Artsy credentials. Once entered you will be redirected to an Authorization page.
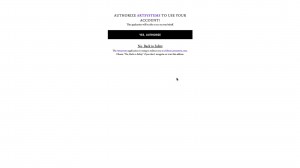
3. Click the “Yes, Authorize” button to authorize and complete the Artsy connection.
Don’t have an existing Artsy account? You can sign up for one here.
Step 2: Configure Works
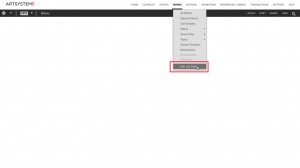
1. After enabling and authorizing the API connection, open the “Works” module in your Artsystem5 database and select “Edit List Fields” from the drop-down panel.
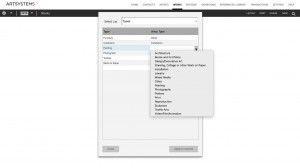
2. Then select “Types” from the “Select List” menu. This will enable you to link your existing A5 inventory types with the established list of Artsy “Medium Types.”
3. For each A5 inventory type available, select the applicable Artsy Medium Type from the pre-populated drop-down list.
4. When all types have been matched, click the “Close” button to apply changes.
Note: Selecting an Artsy Medium Type is required to publish Works on the Artsy platform.
Step 3: Select Work(s) to Share
With the initial setup configured, Works record data can be efficiently transferred to the Artsy CMS. You are now ready to share Work(s) with Artsy!
Note: During this process, you may be prompted to link to an existing Artist entry from the Artsy CMS.
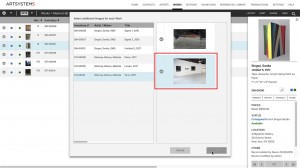
When sharing Works, the primary image for each Work will always be transferred. If you would like to share additional images for each Work, you may select them via the prompt.
During the transfer, text field data and images are pushed from the A5 database to the Artsy CMS. The data and images will automatically populate the appropriate Artsy CMS detail fields.
For sharing Edition-ed works, see Create and Update Editions section below.
Reminder: All data is kept confidential and transmitted using a secure connection, directly from A5 to the Artsy CMS platform.
Step 4: Publish Works on Artsy
Once Works are populated in the Artsy CMS, you can review, revise, and manage them before publishing.
After you have reviewed your Works, click the “Publish” button to push the information to Artsy’s online marketplace.
If any required fields are missing details, the Artsy CMS will prompt you to provide that information before publication of your Works can be completed.
Integration Tips and Tricks
Create and Update Editions
Editioned works or series are sent via the Edition master record in Works. When creating editioned works for Artsy, fields specific to the edition master are also transferred. A5 can send complete edition series information to Artsy, including the size of the edition, the inventory quantity on hand, and the actual numbered series available in the gallery, as well as an AP (Artist Proof) if it exists for the edition series.
As the individual works in the edition series are sold, A5 will also update the inventory quantity on hand and the numbered series remaining available. When all the available works in the gallery are sold, A5 will change the status of the edition from For Sale to Sold.
First, configure Works for sending Editions:
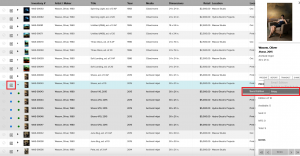
1. Set the Works layout by clicking Layout and selecting the option “Show Edition Masters.” This will group editioned records in the Works spreadsheet under their corresponding Edition master, designated by an “E” icon.
Second, send the Editioned set to Artsy:
2. In Works, navigate to the edition set to send to Artsy and click on the Edition master record.
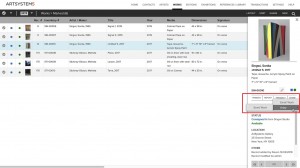
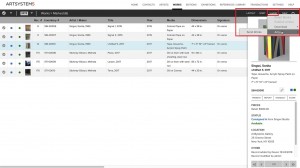
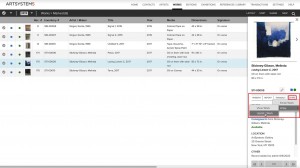
3. In the Preview panel, select the “Share” button and point to “Artsy” then choose “Send Edition.”
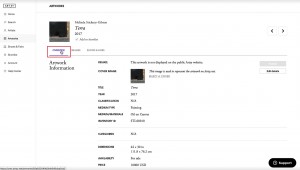
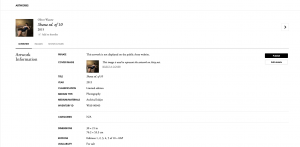
4. Click “Ok” to send the edition and open the preview page on Artsy.
5. To view the Edition specific information, click the Edition tab on the Artsy preview page.
Third, update the Available Inventory in the Edition:
As individual Works in the edition series are invoiced and sold, the Artsy edition will need to be updated to reflect the changes to the available inventory and the numbered objects in the edition series still available.
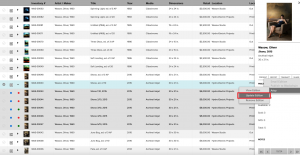
6. Select the edition master record, then in the Preview panel, select the “Share” button and point to “Artsy” and then Update Edition.
7. You will be redirected to the Artsy preview page where you can view the updated edition status and available inventory fields. You will see the fields are now adjusted to reflect the current available inventory in A5 and the status has changed to Sold if there are no longer any available objects in the Edition for sale.
Finally, remove the Edition:
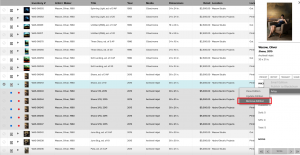
8. Select the edition master record, then in the Preview panel, select the “Share” button and point to “Artsy” and choose “Remove Edition.”
9. A prompt asking “Are you sure you want to remove this edition from Artsy?” will appear. Click “Yes” to remove the edition.
Track Works Shared with Artsy
We recommend keeping a Worksheet in A5 where all Works listed in the Artsy CMS can be tracked once they are transferred. Using an A5 Worksheet is a helpful tool for tracking and record keeping.
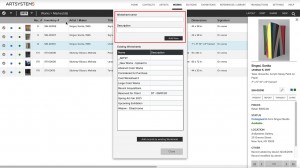
To create a new Worksheet:
1. Ensure all Works shared with Artsy are selected.
2. Click on the “Sets” drop-down from the navigation bar.
3. Select the “Add Records to Worksheet” option.
4. Add the desired details to the “Name” and “Description” fields at the top of the screen to identify your new Worksheet.
5. Click the “Add New” button to finish creating your new Worksheet and adding the selected works to it.
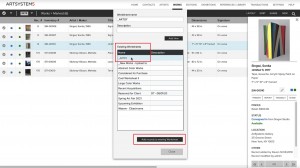
To update an existing Worksheet:
1. Ensure all new Works shared with Artsy are selected.
2. Click on the “Sets” drop-down from the navigation bar.
3. Select the “Add Records to Worksheet” option.
4. Find the name of the existing Worksheet you would like to modify or add to. Select that Worksheet and click the “Add records to existing Worksheet” button.
.
Update Works and Sync to Artsy
If any changes are made to linked Works in the A5 database after the initial transfer, these adjustments can be quickly migrated to Artsy using the “Update Works” option.
1. Apply relevant updates to the Work(s) you wish to edit.
2. Select the Work you are interested in sharing and navigate to the Preview page.
3. Click the “Share” button and choose the “Artsy” selection.
4. Then click “Update Work.” You will then be directed to the updated Work in the Artsy CMS, where changes are automatically applied to the linked fields.
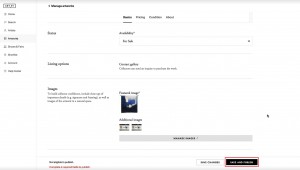
5. Click the “Save and Publish” button to publish those changes on Artsy’s website.
Remove Works from Artsy
If you need to remove works from the Artsy website, you may do so directly from A5 using the “Remove Works” option.
1. Select the Work(s) to remove.
2. In Preview, select the “Share” button and choose the “Artsy” selection and click “Remove Work.”
3. A prompt will appear asking “Do you want to remove this work from Artsy?” Select “Yes” to remove the Work(s).
Your Integration FAQs
Setup only takes a few minutes. Follow the directions above or contact the Artsystems Support team for assistance.
Integrating with Artsy is free for all A5 database users. There is no monthly cost.
The Artsy integration is only supported by our web-based Artsystem5 (A5) database.
Contact our team to learn more about the benefits of A5 and explore your transition options. We offer a streamlined upgrade path for existing Artsystems Pro clients interested in unlocking the Artsy integration and other benefits of the A5 database.
Yes, we also offer integrations with Articheck and QuickBooks.
By submitting this form I understand and agree to the privacy policy.
